By Vikram Vaswani, Developer Advocate - Aug 17, 2022
Rev AI's automatic speech recognition (ASR) APIs enable developers to integrate fast and accurate speech-to-text capabilities into their applications. These APIs can be used to transcribe both pre-recorded and live audio, and include features like automatic punctuation, custom vocabularies, speaker diarization.
This tutorial introduces you to Rev AI's Asynchronous Speech-to-Text API and walks you step-by-step through the process of integrating it with a Web application. It explains how to record audio through a Web application, submit this audio to Rev AI for transcription, and receive and save the transcript to the application database. Through this process, you will learn how to create a Rev AI API client, send requests to the Rev AI API, and use webhooks to receive and process API responses.
The example application in this tutorial is conceived as a tool for people who are constantly on the move, such as medical professionals, journalists or salespeople. It provides a way for these users to record brief voice notes as reminders for themselves or others - for example, patient notes, interview ideas, to-do items and so on. It then transcribes these voice notes and makes the resulting text content viewable and searchable through a Web browser.
Internally, each time a new voice note is recorded, the application transmits the audio to the Rev AI Asynchronous Speech-to-Text API for transcription and saves the resulting text transcript to a MongoDB database. The application is implemented using PHP, with the Guzzle PHP client handling application-API communication on the server and Bootstrap and RecordRTC taking care of the client-side user interface and audio recording respectively.
The complete source code for the example application is available on GitHub, so you can download and try it immediately.
This tutorial assumes that:
- You have a Rev AI account and access token. If not, sign up for a free account and generate an access token.
- You have Docker installed. If not, download and install Docker for your operating system.
- You have Docker Compose installed. If not, install Docker Compose for your operating system.
- You will deploy the application at a public URL. If not, or if you prefer to develop and test locally, download and install
ngrokand obtain anngrokauthentication token. You will need this to generate a temporary public URL for the webhook.
Any application that uses the Rev AI APIs must also comply with Rev AI's API limits and terms of service. Before proceeding, please review these documents and ensure that you are in agreement with them.
This tutorial uses a Docker-based Apache/PHP/MongoDB development environment. If you already have a properly-configured development environment with Apache 2.x, PHP 8.1.x with the MongoDB extension and Composer, you can use that instead. You may need to replace some Docker commands with equivalents.
Within your project directory, create the following Dockerfile and save it as Dockerfile:
FROM php:8.1.8-apache
RUN set -eux; \
  apt-get update; \
  apt-get install -y libcurl4-openssl-dev pkg-config libssl-dev zlib1g-dev zip git; \
  pecl install mongodb; \
  docker-php-ext-enable mongodb;
COPY --from=composer:latest /usr/bin/composer /usr/bin/composer
WORKDIR /var/www
RUN set -eux; \
  a2enmod rewrite; \
  sed -i 's!/var/www/html!/var/www/public!g' /etc/apache2/sites-available/000-default.conf
EXPOSE 80
This Dockerfile inherits from the official PHP Docker image and customizes it to add the PHP MongoDB extension and the Composer dependency manager. It also activates the Apache mod_rewrite module and sets the Apache Web server document root to /var/www/public.
Next, create the following Docker Compose file and save it in the project directory as docker-compose.yml:
version: '3'
services:
    app:
        image: myapp:latest
        container_name: myapp
        ports:
            - 80:80
        volumes:
            - ./:/var/www/
        working_dir: /var/www/
        depends_on:
            - db
        build:
            context: .
            dockerfile: Dockerfile
        command:
            - /bin/bash
            - -c
            - |
              composer install
              apache2-foreground
    db:
        image: mongo:latest
        container_name: mydb
        restart: always
        environment:
          MONGO_INITDB_ROOT_USERNAME: myuser
          MONGO_INITDB_ROOT_PASSWORD: mypassword
        volumes:
            - data:/data/db/
        ports:
            - 27017:27017
volumes:
    data: {}
This Docker Compose file creates two containers: myapp for the application service (PHP/Apache) and mydb for the database service (MongoDB). It mounts the current directory as a volume in the application container at the /var/www mount point and sets root user credentials for the MongoDB service. It also overrides the default startup command of the official PHP Docker image to run composer install before starting Apache, to check for required packages and install them (if required) when the myapp container starts.
Start your development environment by executing the command below:
docker-compose up -dConfirm that both services are running:
docker psYou should see something like this:
CONTAINER ID   IMAGE          COMMAND                  CREATED          STATUS          PORTS                                           NAMES
1e360eaed7e0   myapp:latest   "docker-php-entrypoi…"   12 minutes ago   Up 12 minutes   0.0.0.0:80->80/tcp, :::80->80/tcp               myapp
3d9f343639ab mongo:latest "docker-entrypoint.s…" 12 minutes ago Up 12 minutes 0.0.0.0:27017->27017/tcp, :::27017->27017/tcp mydbThis application will use the following PHP packages:
- Slim: a PHP micro-framework for small Web applications
- Twig-View: a template engine for Slim based on Twig
- PHP-DI: a PHP dependency injection container
- Slim PSR7: a strict PSR-7 implementation used by Slim
- Guzzle: a PHP HTTP client
- MongoDB PHP driver: a PHP API for working with MongoDB databases
Install these packages with the following command:
docker exec -it myapp composer require \
  slim/slim:4.* \
  slim/twig-view \
  php-di/php-di \
  slim/psr7 \
  guzzlehttp/guzzle:7.* \
  mongodb/mongodb \
--with-all-dependenciesCreate and test a minimal application skeleton as described below.
Create the following directories in the project:
public/: for public assetsconfig/: for application configurationviews/: for page templates
mkdir public config viewsCreate the following file to store application configuration. Save it as
config/settings.phpand replace the<REVAI_ACCESS_TOKEN>placeholder with your Rev AI access token.<?php return [ 'rev' => [ 'token' => '<REVAI_ACCESS_TOKEN>', ], ];Prepare a simple Bootstrap base template. Save it as
views/layout.twig.<!doctype html> <html lang="en"> <head> <meta charset="utf-8"> <meta name="viewport" content="width=device-width, initial-scale=1"> <link href="https://cdn.jsdelivr.net/npm/bootstrap@5.1.3/dist/css/bootstrap.min.css" rel="stylesheet" crossorigin="anonymous"> </head> <body> <nav class="navbar navbar-light bg-light border-bottom"> <div class="container-fluid"> <div class="navbar-nav"> <a class="btn btn-primary" href="{{ url_for('index') }}" role="button">Home</a> </div> </div> </nav> <div id="content"> {% block content %} {% endblock %} </div> </body> </html>Create a temporary index page template inheriting from the base template. Save it as
views/index.twig.{% extends "layout.twig" %} {% block content %} <header class="d-flex justify-content-center py-3"> <h1>PAGE UNDER CONSTRUCTION</h1> </header> {% endblock %}Configure URL rewriting rules for Apache and PHP file upload limits by creating the file
public/.htaccesswith the following content:RewriteEngine On RewriteCond %{REQUEST_FILENAME} !-f RewriteCond %{REQUEST_FILENAME} !-d RewriteRule ^ index.php [QSA,L] php_value upload_max_filesize 256M php_value post_max_size 256MCreate the application front controller with the following PHP code. Save it as
public/index.php.<?php use Psr\Http\Message\ResponseInterface as Response; use Psr\Http\Message\ServerRequestInterface as Request; use Slim\Factory\AppFactory; use Slim\Views\Twig; use Slim\Views\TwigMiddleware; use Slim\Routing\RouteContext; use DI\ContainerBuilder; use GuzzleHttp\Client; use GuzzleHttp\Psr7; use MongoDB\BSON\ObjectID; // load dependencies require __DIR__ . '/../vendor/autoload.php'; // create DI container $containerBuilder = new ContainerBuilder(); // define services $containerBuilder->addDefinitions( [ 'settings' => function () { return include __DIR__ . '/../config/settings.php'; }, 'view' => function () { return Twig::create(__DIR__ . '/../views'); }, ] ); $container = $containerBuilder->build(); AppFactory::setContainer($container); // create application with DI container $app = AppFactory::create(); // add Twig middleware $app->add(TwigMiddleware::createFromContainer($app)); // add error handling middleware $app->addErrorMiddleware(true, true, true); // GET request handler for index page $app->get( '/[index[/]]', function (Request $request, Response $response, $args) { return $this->get('view')->render( $response, 'index.twig', [] ); } )->setName('index'); $app->run();
This front controller script sets up a minimal Slim application.
- It begins by loading all the required classes using the Composer auto-loader.
- It creates a PHP Dependency Injection (DI) container with entries for two services:
settingsfor the application configuration andviewfor the Twig template engine. - It creates a new Slim application
$appand associates it with the DI container. - It adds Twig-View middleware and error handling middleware to the application.
- It defines a route handler named
indexforGET /andGET /indexrequests. This handler returns the temporatryviews/index.twigtemplate created previously. - It runs the application with
$app->run().
Test this skeleton application by browsing to http://<DOCKER_HOST> and confirming that you see the following output:
With the basic application skeleton defined, it's now time to move on to capturing audio. For a Web application, this is done in the client using WebRTC. A number of JavaScript libraries are available to simplify this integration; this tutorial uses the MIT-licensed RecordRTC library, which comes with extensive documentation and can be delivered to the client via CDN.
Begin by creating a page template with a start/stop recording button, as below. Save this as views/add.twig.
{% extends "layout.twig" %}

{% block content %}
  <header class="d-flex justify-content-center py-3">
    <h1>Add Note</h1>
  </header>

  <div class="d-flex justify-content-center btn-group-lg mb-5">
    <button type="button" class="btn btn-success btn-control">Start recording</button>
  </div>
  <h4 class="justify-content-center timer" style="text-align:center"></h4>

  <script src="https://cdnjs.cloudflare.com/ajax/libs/RecordRTC/5.5.6/RecordRTC.js"></script>

  <script>
  const controlButton = document.querySelector('.btn-control');
  const timer = document.querySelector('.timer');

  navigator.mediaDevices.getUserMedia({
    video: false,
    audio: true
  }).then(async function(stream) {

    const recorder = RecordRTC(stream, {
      type: 'audio',
      mimeType: 'audio/wav',
      recorderType: StereoAudioRecorder
    });

    controlButton.onclick = function() {
      if (controlButton.textContent === 'Start recording') {
        startRecording();
      } else {
        stopAndProcessRecording();
      }
    }

    startRecording = function() {
      controlButton.textContent = 'Stop recording';
      controlButton.classList.toggle('btn-danger');
      recorder.startRecording();
    }

    stopAndProcessRecording = function() {
      controlButton.disabled = true;
      recorder.stopRecording(function() {
        const blob = recorder.getBlob();
        const formData = new FormData();
        formData.append('file', blob);
        fetch('', {
          method: 'POST',
          body: formData
        })
        .then(response => {
          if (response.ok === false) {
            window.location.href = '{{ url_for('index', {}, {'status':'error'}) }}';
          } else {
            window.location.href = '{{ url_for('index', {}, {'status':'submitted'}) }}';
          }
        })
      });
    }
  }).catch(function(error) {
    console.error(error);
  });

  </script>
{% endblock %}
On page load, the script uses the getUserMedia() method of the Media Streams API to prompt the user to allow audio recording within the browser. If permission is granted, it creates a RecordRTC audio recorder object and configures it for a WAV audio stream.
The page also defines an HTML button element, which allows the user to control audio recording. When the user clicks this control button, the button's onclick event handler takes care of toggling the recorder state using two functions: startRecording() and stopAndProcessRecording().
- The
startRecording()function merely changes the button label and color and calls the recorder'sstartRecording()function. - The
stopAndProcessRecording()function is more complex:- When invoked, it first disables the button (to avoid re-recording) and then calls the recorder's
stopRecording()method with a callback function. - This callback function gets the recorded audio as a binary object (
getBlob()) and uploads it to the server using amultipart/form-dataPOST HTTP request (fetch()). - It uses the
response.okflag to check if the request was successful or not. - Finally, it redirects the client back to the index page, passing along a success or error flag as a URL query parameter.
- When invoked, it first disables the button (to avoid re-recording) and then calls the recorder's
RecordRTC logs all its operations to the console so if you're curious about how it works, watch your browser console while interacting with the above page.
To reduce upload time and bandwidth consumption, the example application restricts each audio recording to 15 seconds. This restriction is specific to the example application only and is not imposed by the Rev AI API. Read more about API limits.
The application front controller must now be updated to accept the file uploaded in Step 4 and, in turn, trigger a transcription job request to the Rev AI Asynchronous Speech-to-Text API endpoint at https://api.rev.ai/speechtotext/v1/jobs. This request also be a multipart/form-data request containing the binary file data and job options; it must also include an Authorization header containing the Rev AI access token.
Here is an example of sending an audio file to the API for transcription:
curl -X POST "https://api.rev.ai/speechtotext/v1/jobs" \
     -H "Authorization: Bearer <REVAI_ACCESS_TOKEN>" \
     -H "Content-Type: multipart/form-data" \
     -F "media=@/<FILEPATH>" \
     -F "options={\"filter_profanity\":\"true\"}"
A number of options can be submitted with the job request to control the transcription process. Once the job is submitted to the Rev AI API, the API will return a unique job identifier.
Here is an example response from the API:
{
  "id":"AxYUC5GSuXZD",
  "created_on":"2022-04-25T10:41:27.535Z",
  "name":"FTC_Sample_1.mp3",
  "filter_profanity":true,
  "status":"in_progress",
  "type":"async",
  "language":"en"
}
Files uploaded to the Asynchronous Speech-to-Text API using multipart/form-data must be less than 2 GB in size. Media files longer than 17 hours are not supported for English transcription. Read more about API limits.
Start implementing this functionality as below:
Update the
config/settings.phpfile with an additional configuration key for the MongoDB database credentials. If you are using thedocker-compose.ymlfile from Step 1, replace the<MONGODB_URI>placeholder with the credentials stringmongodb://myuser:mypassword@db.<?php return [ 'rev' => [ 'token' => '<REVAI_ACCESS_TOKEN>', ], 'mongo' => [ 'uri' => '<MONGODB_URI>' ] ];Update the front controller at
public\index.phpwith the following changes:Modify the DI container and initialize Guzzle and MongoDB clients, which will be used to communicate with the Rev AI API and the application database respectively:
<?php
// ...

// define services
$containerBuilder->addDefinitions(
    [
        'settings' => function () {
            return include __DIR__ . '/../config/settings.php';
        },
        'view'     => function () {
            return Twig::create(__DIR__ . '/../views');
        },
        'mongo'    => function ($c) {
            return new MongoDB\Client($c->get('settings')['mongo']['uri']);
        },
        'guzzle'   => function ($c) {
            $token = $c->get('settings')['rev']['token'];
            return new Client(
                [
                    'base_uri' => 'https://api.rev.ai/speechtotext/v1/jobs',
                    'headers'  => ['Authorization' => "Bearer $token"],
                ]
            );
        },
    ]
);

// ...
* Create a GET route handler for a new `/add` URL endpoint, which returns the recording interface in the `add.twig` page template

  ```php
  <?php
  // ...

  // GET request handler for /add page
  $app->get(
    '/add',
    function (Request $request, Response $response, $args) {
        return $this->get('view')->render(
            $response,
            'add.twig',
            []
        );
    }
  )->setName('add');

  // ...
Create a POST route handler for the
/addURL endpoint, which accepts and processes the uploaded audio file as described earlier.<?php // ... // POST request handler for /add page $app->post( '/add', function (Request $request, Response $response) { // get MongoDB service // insert a record in the database for the audio upload // get MongoDB document ID $mongoClient = $this->get('mongo'); try { $insertResult = $mongoClient->mydb->notes->insertOne( [ 'status' => 'JOB_RECORDED', 'ts' => time(), 'jid' => false, 'error' => false, 'data' => false, ] ); $id = (string) $insertResult->getInsertedId(); // get uploaded file // if no upload errors, change status in database record $uploadedFiles = $request->getUploadedFiles(); $uploadedFile = $uploadedFiles['file']; if ($uploadedFile->getError() === UPLOAD_ERR_OK) { $mongoClient->mydb->notes->updateOne( [ '_id' => new ObjectID($id), ], [ '$set' => ['status' => 'JOB_UPLOADED'], ] ); // get Rev AI API client // submit audio to API as POST request $revClient = $this->get('guzzle'); $revResponse = $revClient->request( 'POST', 'jobs', [ 'multipart' => [ [ 'name' => 'media', 'contents' => fopen($uploadedFile->getFilePath(), 'r'), ], [ 'name' => 'options', 'contents' => json_encode( [ 'metadata' => $id, 'skip_diarization' => 'true', ] ), ], ], ] )->getBody()->getContents(); // get API response // if no API error, update status in database record // send 200 response code to client $json = json_decode($revResponse); $mongoClient->mydb->notes->updateOne( [ '_id' => new ObjectID($id), ], [ '$set' => [ 'status' => 'JOB_TRANSCRIPTION_IN_PROGRESS', 'jid' => $json->id, ], ] ); $response->getBody()->write(json_encode(['success' => true])); return $response->withHeader('Content-Type', 'application/json')->withStatus(200); } } catch (\GuzzleHttp\Exception\RequestException $e) { // in case of API error // update status in database record // send error code to client with error message as payload $mongoClient->mydb->notes->updateOne( [ '_id' => new ObjectID($id), ], [ '$set' => [ 'status' => 'JOB_TRANSCRIPTION_FAILURE', 'error' => $e->getMessage(), ], ] ); $response->getBody()->write(json_encode(['success' => false])); return $response->withHeader('Content-Type', 'application/json')->withStatus($e->getResponse()->getStatusCode()); } } ); // ...
This route handler contains a lot of code, so let's step through it:
When this endpoint is invoked with a HTTP POST request containing a
multipart/form-datafile upload, the handler first inserts a new document in the MongoDB database with the MongoDB client'sinsertOne()method. This document is empty save for the timestamp and astatusfield, which at this point is set toJOB_RECORDED. The handler also stores the unique document identifier returned by the MongoDB client'sgetInsertedId()method.The handler gets the uploaded file via the request object's
getUploadedFiles()method and check for errors via thegetError()method. If the file was uploaded successfully, the documentstatusis updated toJOB_UPLOADEDusing the MongoDB client'supdateOne()method.The handler uses the Guzzle Rev AI API client to prepare and send a HTTP POST request to
https://api.rev.ai/speechtotext/v1/jobs. As described earlier, this is amultipart/form-datarequest containing the uploaded audio file and anoptionsobject containing two keys: ametadatakey containing the MongoDB document identifier for later cross-referencing, and askip_diarizationflag to skip speaker diarization.If the API request is successful, the handler decodes the JSON response body, extracts the Rev AI job identifier and adds it to the database record. It also updates the document
statustoJOB_TRANSCRIPTION_IN_PROGRESS. It returns a JSON document indicating success to the client with a200response code.If the API request fails for any reason - for example, due to an invalid access token or a problem with the audio file - the Guzzle client will receive an error code from the API and throw an exception. The exception handler catches this exception and updates the document status to
JOB_TRANSCRIPTION_FAILURE. It returns a JSON document indicating failure to the client with the Rev AI server error code.:::info Learn more about submitting an asynchronous transcription job and obtaining a transcript. :::
Update the GET route handler for the
/indexendpoint to take account of the new status parameter passed along in the URL by the client-sidestopAndProcessRecording()function in Step 4. This parameter is transferred to the index page template as a Twig template variable.<?php // ... // GET request handler for index page $app->get( '/[index[/]]', function (Request $request, Response $response, $args) { $params = $request->getQueryParams(); return $this->get('view')->render( $response, 'index.twig', [ 'status' => !empty($params['status']) ? $params['status'] : null, ] ); } )->setName('index'); // ...For reference, here is the complete front controller script incorporating all the changes discussed above. Replace the
public\index.phpfile with this version.<?php use Psr\Http\Message\ResponseInterface as Response; use Psr\Http\Message\ServerRequestInterface as Request; use Slim\Factory\AppFactory; use Slim\Views\Twig; use Slim\Views\TwigMiddleware; use Slim\Routing\RouteContext; use DI\ContainerBuilder; use GuzzleHttp\Client; use GuzzleHttp\Psr7; use MongoDB\BSON\ObjectID; // load dependencies require __DIR__ . '/../vendor/autoload.php'; // create DI container $containerBuilder = new ContainerBuilder(); // define services $containerBuilder->addDefinitions( [ 'settings' => function () { return include __DIR__ . '/../config/settings.php'; }, 'view' => function () { return Twig::create(__DIR__ . '/../views'); }, 'mongo' => function ($c) { return new MongoDB\Client($c->get('settings')['mongo']['uri']); }, 'guzzle' => function ($c) { $token = $c->get('settings')['rev']['token']; return new Client( [ 'base_uri' => 'https://api.rev.ai/speechtotext/v1/jobs', 'headers' => ['Authorization' => "Bearer $token"], ] ); }, ] ); $container = $containerBuilder->build(); AppFactory::setContainer($container); // create application with DI container $app = AppFactory::create(); // add Twig middleware $app->add(TwigMiddleware::createFromContainer($app)); // add error handling middleware $app->addErrorMiddleware(true, true, true); // GET request handler for index page $app->get( '/[index[/]]', function (Request $request, Response $response, $args) { $params = $request->getQueryParams(); return $this->get('view')->render( $response, 'index.twig', [ 'status' => !empty($params['status']) ? $params['status'] : null, ] ); } )->setName('index'); // GET request handler for /add page $app->get( '/add', function (Request $request, Response $response, $args) { return $this->get('view')->render( $response, 'add.twig', [] ); } )->setName('add'); // POST request handler for /add page $app->post( '/add', function (Request $request, Response $response) { // get MongoDB service // insert a record in the database for the audio upload // get MongoDB document ID $mongoClient = $this->get('mongo'); try { $insertResult = $mongoClient->mydb->notes->insertOne( [ 'status' => 'JOB_RECORDED', 'ts' => time(), 'jid' => false, 'error' => false, 'data' => false, ] ); $id = (string) $insertResult->getInsertedId(); // get uploaded file // if no upload errors, change status in database record $uploadedFiles = $request->getUploadedFiles(); $uploadedFile = $uploadedFiles['file']; if ($uploadedFile->getError() === UPLOAD_ERR_OK) { $mongoClient->mydb->notes->updateOne( [ '_id' => new ObjectID($id), ], [ '$set' => ['status' => 'JOB_UPLOADED'], ] ); // get Rev AI API client // submit audio to API as POST request $revClient = $this->get('guzzle'); $revResponse = $revClient->request( 'POST', 'jobs', [ 'multipart' => [ [ 'name' => 'media', 'contents' => fopen($uploadedFile->getFilePath(), 'r'), ], [ 'name' => 'options', 'contents' => json_encode( [ 'metadata' => $id, 'skip_diarization' => 'true', ] ), ], ], ] )->getBody()->getContents(); // get API response // if no API error, update status in database record // send 200 response code to client $json = json_decode($revResponse); $mongoClient->mydb->notes->updateOne( [ '_id' => new ObjectID($id), ], [ '$set' => [ 'status' => 'JOB_TRANSCRIPTION_IN_PROGRESS', 'jid' => $json->id, ], ] ); $response->getBody()->write(json_encode(['success' => true])); return $response->withHeader('Content-Type', 'application/json')->withStatus(200); } } catch (\GuzzleHttp\Exception\RequestException $e) { // in case of API error // update status in database record // send error code to client with error message as payload $mongoClient->mydb->notes->updateOne( [ '_id' => new ObjectID($id), ], [ '$set' => [ 'status' => 'JOB_TRANSCRIPTION_FAILURE', 'error' => $e->getMessage(), ], ] ); $response->getBody()->write(json_encode(['success' => false])); return $response->withHeader('Content-Type', 'application/json')->withStatus($e->getResponse()->getStatusCode()); } } ); $app->run();
Update the
views/index.twigpage template to use thestatusTwig template variable and display a success or failure message to the user.{% extends "layout.twig" %} {% block content %} <header class="d-flex justify-content-center py-3"> <h1>My Notes</h1> </header> {% if status == 'submitted' %} <div class="alert alert-success text-center" role="alert">Audio sent for transcription.</div> {% endif %} {% if status == 'error' %} <div class="alert alert-danger text-center" role="alert">Audio transcription failed.</div> {% endif %} {% endblock %}Finally, update the base template
public\layout.twigto include an additional button in the top right corner for the new "Add Note" page:<!doctype html> <html lang="en"> <head> <meta charset="utf-8"> <meta name="viewport" content="width=device-width, initial-scale=1"> <link href="https://cdn.jsdelivr.net/npm/bootstrap@5.1.3/dist/css/bootstrap.min.css" rel="stylesheet" crossorigin="anonymous"> </head> <body> <nav class="navbar navbar-light bg-light border-bottom"> <div class="container-fluid"> <div class="navbar-nav"> <a class="btn btn-primary" href="{{ url_for('index') }}" role="button">Home</a> </div> <div class="navbar-nav justify-content-end"> <a class="btn btn-primary" href="{{ url_for('add') }}" role="button">Add</a> </div> </div> </nav> <div id="content"> {% block content %} {% endblock %} </div> </body> </html>
Test the example application by browsing to http://<DOCKER_HOST> and clicking the new "Add" button in the top right corner. You should see the page below.
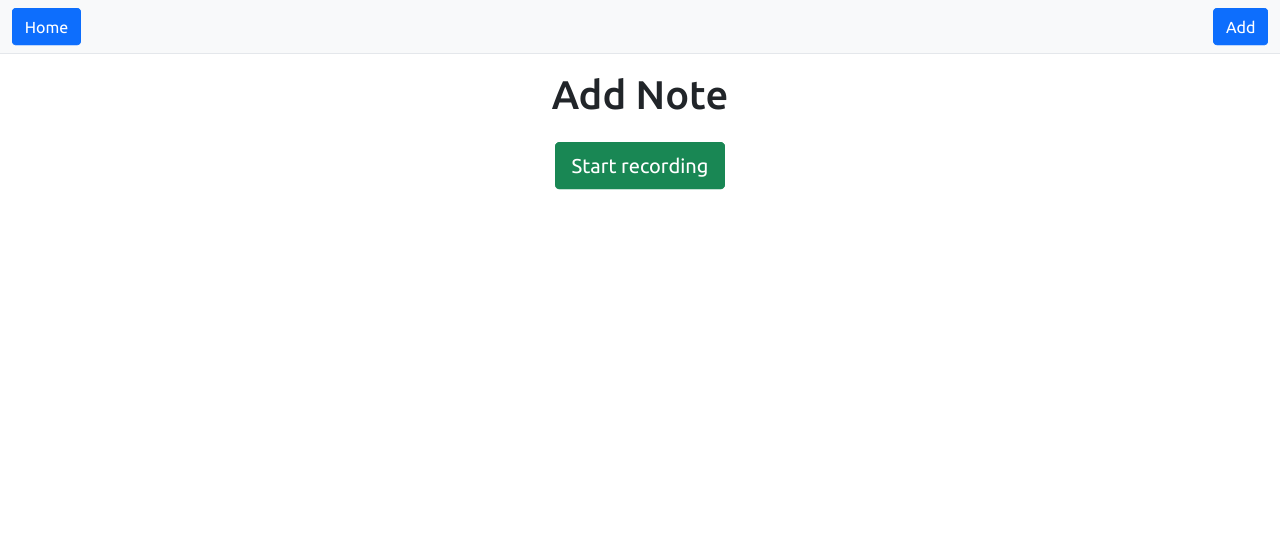
The browser will prompt for access to the system microphone. Grant this permission, then click the "Start recording" button. Speak and click "Stop recording" once done. Your audio will be uploaded and you should be redirected back to the index page.

Query the MongoDB database to check the status of your recording as shown below. Replace the MONGODB_URI placeholder with the same credentials used in the previous step. You will see a new MongoDB document with a Rev AI job identifier.
docker exec -it mydb mongosh <MONGODB_URI>
admin> use mydb
switched to db mydb
mydb> db.notes.find()
[
{
_id: ObjectId("62667cae5fac4d5871017cb2"),
status: 'JOB_TRANSCRIPTION_IN_PROGRESS',
ts: 1650883758,
jid: 'JDmCeVLfjlFO',
error: false,
data: false
}
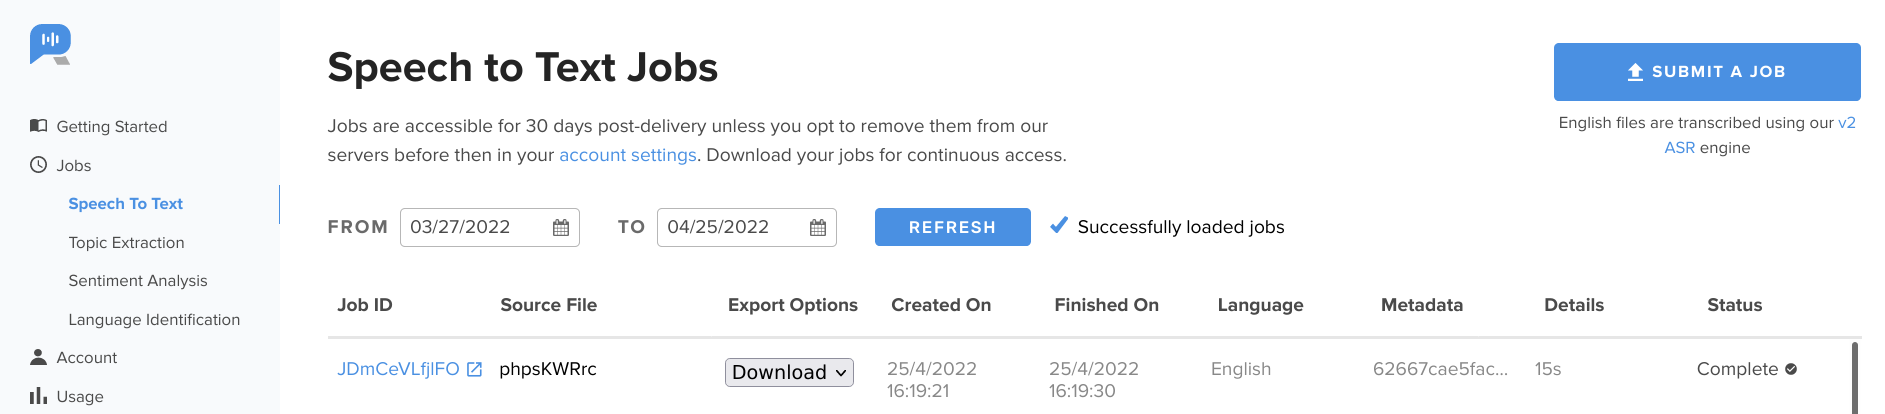
]Check your Rev AI account dashboard at https://www.rev.ai/jobs/speech-to-text. You will be able to see the status of the job and also download the final transcript.
With this, the first part of the example speech-to-text Web application is complete, with audio being received and recorded through the browser and submitted to Rev AI for transcription. In the second part of this tutorial, you will learn how to retrieve the final transcript from Rev AI using the API and display it in the Web application. You will also learn how to delete and search transcripts within the Web application interface
Learn more about developing speech-to-text applications with Rev AI and PHP by visiting the following links:
- Documentation: Asynchronous Speech-To-Text API job submission
- Code samples: Asynchronous Speech-To-Text API
- Tutorial: Get Started with Speech Recognition in PHP
- Tutorial: Asynchronous Speech-To-Text API best practices
- Documentation: Slim framework
- Documentation: Guzzle PHP HTTP client
- Documentation: MongoDB PHP driver